<?xml version="1.0" encoding="utf-8"?><feed xmlns="http://www.w3.org/2005/Atom" xml:lang="en-GB"><generator uri="https://jekyllrb.com/" version="3.10.0">Jekyll</generator><link href="https://tobsecret.github.io/feed.xml" rel="self" type="application/atom+xml" /><link href="https://tobsecret.github.io/" rel="alternate" type="text/html" hreflang="en-GB" /><updated>2026-08-20T21:30:29-04:00</updated><id>https://tobsecret.github.io/feed.xml</id><title type="html">Tobsecret’s homepage</title><subtitle>Programming Blog &amp; Dominion sets</subtitle><author><name>Tobias Schraink</name></author><entry><title type="html">Sharding pytest by file cut collection time from 3 minutes to 40 seconds</title><link href="https://tobsecret.github.io/2026/08/20/Sharding-Tests-by-File/" rel="alternate" type="text/html" title="Sharding pytest by file cut collection time from 3 minutes to 40 seconds" /><published>2026-08-20T08:00:00-04:00</published><updated>2026-08-20T08:00:00-04:00</updated><id>https://tobsecret.github.io/2026/08/20/Sharding-Tests-by-File</id><content type="html" xml:base="https://tobsecret.github.io/2026/08/20/Sharding-Tests-by-File/"><![CDATA[<p>When your pytest CI unit test workflow starts taking longer and longer, you’ll want to speed it up. We don’t like to wait for tests to complete in CI, and while you can run them locally, eventually it will take a long time on your local machine as well. Waiting for tests to complete wastes developer time, so let’s speed up your pytest CI workflow.
The first most obvious step is to use a plugin like <code class="language-plaintext highlighter-rouge">xdist</code> to parallelize the tests across multiple workers. A standard GitHub Actions runner comes with two cores by default so we set <code class="language-plaintext highlighter-rouge">-n 2 --dist=loadgroup</code> which means we spawn two workers which get assigned a set of tests each.</p>

<p>Eventually this will be too slow as well and you will want to run multiple CI jobs with a matrix strategy.
We started using the <code class="language-plaintext highlighter-rouge">split</code> plugin for this which lets you record test times and split them into balanced shards so each matrix job should take around the same amount of time. We always have to wait for all tests to complete in our CI, so we care that they are well-balanced since the longest shard is the limiting factor.
The test durations are recorded in a <code class="language-plaintext highlighter-rouge">.test_durations</code> file that is committed into the repo. There will be drift over time so tests without known test duration will be assumed to have the arithmetic mean test duration from the known test durations.</p>

<p>Recently our test jobs had once again reached too high a duration and initially my plan was to just increase the number of shards again. However, even when doubling the shards I noticed only a minor speedup.
When going through the logs of the recent test run I noticed that pytest startup took over 3 minutes:</p>

<ul style="margin-left: 40px;">
  <li>Python, uv setup and syncing dependencies: ~25 seconds</li>
  <li>Docker/test infrastructure: ~16 seconds</li>
  <li>Pytest startup/import/collection: ~3 minutes</li>
  <li>Actual test execution: ~3½ minutes</li>
</ul>

<p>Digging into it, it turns out the major slow down came from each shard and each worker in each shard collecting all of the test files. At around <strong>18k</strong> tests split across around <strong>1.5k</strong> files, the collection of tests was starting to add up to almost half of the runtime of our CI test jobs.</p>

<p>This makes sense since the shards are balanced by individual test times so there is no guarantee collection can skip any files, so the plugin lets pytest collect all tests and then tells it which ones to deselect in <code class="language-plaintext highlighter-rouge">pytest_collection_modifyitems</code>.</p>

<p>This fine-grained balancing of test shards by individual test durations can be necessary if you have outlier tests concentrated in just a few test files. However in our codebase we can balance shards for our unit tests by test files instead of by individual tests because test files generally have a small number of tests and outliers aren’t too extreme (our longest measured test file takes <em>24.8s</em>).</p>

<iframe src="/assets/blog/2026-08-20/2026-08-20-beakr-file-test-duration-histogram.html" width="100%" height="600" style="border:none;"></iframe>

<p class="caption"><em>Figure 1: Histogram of test durations. X-axis is logarithmic. Longest test file took 24.8s, shortest under a ms. Bimodal distribution with means at 10ms and 1s.</em></p>

<p>Balancing by test shards allows us to use the <code class="language-plaintext highlighter-rouge">pytest_ignore_collect</code> hook to avoid collecting the entire test code base in each shard and instead only collect the assigned files.
Here an abridged time line of the <code class="language-plaintext highlighter-rouge">pytest_collect</code> phases:</p>

<h5 id="pytest_collection">pytest_collection</h5>
<ul style="margin-left: 40px;">
  <li>pytest_ignore_collect<br />
Our sharder rejects unassigned directories and files<br />
→ rejected files are never imported</li>
  <li>pytest_collect_directory, pytest_collect_file, pytest_pycollect_makemodule, pytest_pycollect_makeitem, pytest_generate_tests<br />
→ collects tests and generates the test objects</li>
  <li>pytest_collection_modifyitems, pytest_deselected<br />
→ plugins apply filters, marks, reorders to collected items and finally lets plugins know about which tests have been deselected</li>
</ul>

<p>Without file-based sharding test collection took 3:08 minutes:</p>

<div class="language-plaintext highlighter-rouge"><div class="highlight"><pre class="highlight"><code>13:59:56 GMT ~  uv run pytest -n 2 --dist=loadgroup -m "not e2e” --splits 8 --group 4 --splitting-algorithm least_duration
14:03:04 GMT ~ ========================= test session starts =========================
</code></pre></div></div>

<p>With file-based sharding it took 40s:</p>
<div class="language-plaintext highlighter-rouge"><div class="highlight"><pre class="highlight"><code>20:48:10 GMT ~ uv run pytest -n 2 --dist=loadgroup -m "not e2e" --fsplits 8 --fgroup 4
20:48:50 GMT ~ ========================= test session starts =========================
</code></pre></div></div>

<p><strong>a tiny nitpick here - the second time stamp also includes the first test that was run, so there is variability introduced by that but we know that it’s not significant since our longest recorded test in test durations is 7s, so even if we double that we’re saving 2 minutes</strong></p>

<p>With around 1.7k runs (not shards, full runs) of our unit test CI workflow last month, that amounts to roughly 57 hours of time saved. Of course developers usually don’t sit there waiting for CI to finish, so this is a purely theoretical number and the more realistic return is that it feels good in the cases when you are eager for the tests to finish so you can submit a PR for review.</p>

<p>Without this optimization your test setup scales worse and worse through sharding as your test codebase grows and your test shards spend more and more of their time collecting tests and less time actually running tests.</p>

<p>We built <a href="https://github.com/BeakrHub/pytest-fsplit">pytest-fsplit</a> for this purpose. It’s built with <code class="language-plaintext highlighter-rouge">pytest-xdist</code>, <code class="language-plaintext highlighter-rouge">pytest-split</code> and <code class="language-plaintext highlighter-rouge">nbval</code> in mind. 
You could of course also use an alternative like <code class="language-plaintext highlighter-rouge">rpytest</code> or <code class="language-plaintext highlighter-rouge">maelstrom</code> but for us this little pytest plugin was the right fix.</p>

<h3 id="installation">Installation</h3>

<div class="language-plaintext highlighter-rouge"><div class="highlight"><pre class="highlight"><code>pip install pytest-fsplit
</code></pre></div></div>

<h3 id="usage">Usage</h3>

<p>First record durations from a complete, unsharded run:</p>

<div class="language-plaintext highlighter-rouge"><div class="highlight"><pre class="highlight"><code>pytest --fsplit-store-durations
</code></pre></div></div>
<p>Which produces the aforementioned <code class="language-plaintext highlighter-rouge">.test_durations</code>.</p>

<p>Then run each file shard separately similar to how you would with <code class="language-plaintext highlighter-rouge">pytest-split</code>:</p>

<div class="language-plaintext highlighter-rouge"><div class="highlight"><pre class="highlight"><code>pytest --fsplits 4 --fgroup 1
pytest --fsplits 4 --fgroup 2
pytest --fsplits 4 --fgroup 3
pytest --fsplits 4 --fgroup 4
</code></pre></div></div>]]></content><author><name>Tobias Schraink</name></author><summary type="html"><![CDATA[When your pytest CI unit test workflow starts taking longer and longer, you’ll want to speed it up. We don’t like to wait for tests to complete in CI, and while you can run them locally, eventually it will take a long time on your local machine as well. Waiting for tests to complete wastes developer time, so let’s speed up your pytest CI workflow. The first most obvious step is to use a plugin like xdist to parallelize the tests across multiple workers. A standard GitHub Actions runner comes with two cores by default so we set -n 2 --dist=loadgroup which means we spawn two workers which get assigned a set of tests each.]]></summary><media:thumbnail xmlns:media="http://search.yahoo.com/mrss/" url="https://tobsecret.github.io/assets/default-social-image.png" /><media:content medium="image" url="https://tobsecret.github.io/assets/default-social-image.png" xmlns:media="http://search.yahoo.com/mrss/" /></entry><entry><title type="html">Ephemeral Sandboxes in the Cloud</title><link href="https://tobsecret.github.io/2026/08/10/Ephemeral-Sandboxes/" rel="alternate" type="text/html" title="Ephemeral Sandboxes in the Cloud" /><published>2026-08-10T08:00:00-04:00</published><updated>2026-08-10T08:00:00-04:00</updated><id>https://tobsecret.github.io/2026/08/10/Ephemeral-Sandboxes</id><content type="html" xml:base="https://tobsecret.github.io/2026/08/10/Ephemeral-Sandboxes/"><![CDATA[<p>Every tech company faces this problem at some point: features are tested locally but shipped in the cloud, and the discrepancies are often difficult to account for. Short-lived cloud-native sandboxes are one way to address this and come with a few additional benefits.
These ephemeral sandboxes allow us developers to share a working live version of our app with other members of the company, have them interact with it and allow us to afterwards query the logs to see if everything worked as intended. This async cloud-native nature makes ephemeral sandboxes an attractive solution, even for tech stacks that can comfortably stay performant on the local dev stack.</p>

<p>I was inspired by <a href="https://shopify.engineering/shopifys-cloud-development-journey">shopify’s “The Journey to Cloud Development” </a> article series to build such a system for our team. I especially liked how they talked through their iteration process all the way from very early experiments to finding the solution that worked for their developers. They do a great job explaining the decisions, failures and wins along the way.</p>

<p>While it was a great inspiration our path to sandboxes was different. Unlike the developers at shopify, we did not typically run into the issue of having too little compute for running our local dev setup. If anything we had too much compute power and workloads that looked fine on a local machine could fail in the cloud.
At work we develop in a typical web application stack, a frontend, a backend API service, worker queues, cache and a database. 
We already had a stable sandbox with automated deploys, but our CD pipeline to said sandbox was gatekept by approval and typically done in larger releases rather than truly continuously. As a result, testing my changes in our real full stack required waiting until the sandbox branch was merged and deployed to our stable sandbox.</p>

<p>Being able to spin up such sandboxes also opens the door to letting agents test changes in full-stack environments for which we’d want that emulation of our production stack to be as close as possible.</p>

<h2 id="implementation">Implementation</h2>
<p>So I set out to scope and build a system that would allow us to easily create an ephemeral sandbox off of work in progress. The first question was how the system should be controlled: a signal sent from a local machine (i.e. via a script), a signal sent from a PR or from some other central resource like slack?
I decided to tie it to PRs. This leaves a visible and centralized record, it ties it to an individual unit of work and it lets us easily get back to a sandbox if we need to.</p>

<p>I opted to go for a comment-driven workflow powered by GitHub actions because comments are easy to understand and carry the PR context with them. A /sandbox create comment would create a sandbox and similar commands exist to poll the status of a sandbox, to update one with newly pushed changes, and to destroy a sandbox when no longer needed.</p>

<p>Every sandbox should also be uniquely identifiable. Since we base each on a branch, we use the hash of that branch name to create a unique sandbox id.</p>

<p>The next question was around how we should provision the infrastructure. The most naive, faithful and complete option would be to create a 1-1 copy of the sandbox environment, entirely on its own VPC, gateway, with its own ALB, subnets, app workers, db server, etc.
This isn’t feasible for cost reasons but also because AWS sets a per-account limit on the max number of resources per region, which is especially low for VPCs, Elastic IPs, and NAT gateways.</p>

<p>So instead I opted for a solution where we reuse most of the existing infrastructure in our sandbox environment. We use our unique sandbox ID to tag all associated resources. This makes it much easier to take them down.
The only top level infrastructure resources we provision entirely newly are the app and worker queue tasks in ECS. We route them through the shared ALB, have them use the same REDIS cache instances but with their own queues.</p>

<p>The database required the biggest effort in all of this. I did consider seeding the database with our typical local seed script but decided against it. I wanted my colleagues to have a really familiar environment so they can easily reuse and inspect resources they have created. As a result I decided to use the existing stable sandbox db as the basis for populating ephemeral sandboxes.</p>

<p>Initially I tested out the naive method of copying the entire existing stable sandbox db on every ephemeral sandbox. The idea was that this would have resulted in the most up-to-date data in the fresh ephemeral sandbox db. Unsurprisingly this turned out to be prohibitively slow and would put a lot of strain on the db server. 
So instead I maintain a template db on the db server which is copied nightly from the stable sandbox db on the same server. When we provision a new ephemeral sandbox we clone from the template db and then apply migrations and security permissions. This is much faster and less strain on the db server. However, it also means that the ephemeral sandbox db lags behind the original sandbox db by the update cadence of the template db.</p>

<h2 id="impact">Impact</h2>

<p>Our <span class="footnote-hover">GTM lead’s<span class="tooltip-text"> Go To Market Lead - in charge of launching products to potential buyers</span> </span> eyes lit up when he realized we’d be able to quickly set up a demo from a feature branch to show a customer a fully-functioning custom integration they might have asked about, all without needing to have our GTM team setup a local coding environment. They just click on the frontend link and do their full demo.
Our engineers have been using the sandboxes for demoing and more importantly sharing changes. It has been particularly nice for async review of large coupled frontend/backend reworks.</p>

<p>I myself use the sandboxes whenever I need to test how certain objects work in our cloud environment or when I develop a feature with a frontend component that I want feedback on.</p>

<h2 id="leftover-crumbs">Leftover crumbs</h2>
<p>No project like this is perfect and of course right out the gate a few requests have landed.</p>

<p>The most consistent feedback I have gotten is that real-time syncing of the database would be nice. As soon as developers and GTM realized that all their content from stable sandboxes could be available, they asked how easy it would be to keep all the sandboxes in sync. Unfortunately in the current system I don’t see a good way to get true real-time syncing because we cannot expect the db schema to be the same between an ephemeral sandbox and the stable sandbox.</p>

<p>I have also been asked about the reverse, i.e. syncing changes from ephemeral sandboxes back to the stable sandbox. This is similarly challenging but slightly more realistic because we could potentially copy over data after the PR contents make it into the stable sandbox.</p>

<p>Surprisingly the startup time of 14 minutes for a fresh sandbox has not been subject to criticism. Developers find something else to do in the meantime. I have identified work to get about 6 minutes of potential time saves but they are more involved and startup time does not seem to be a big issue currently.</p>

<p>Scalability of ephemeral sandboxes isn’t a huge factor for us as a team right now but when it becomes more important, I will also have to revisit shaping our infra so it can more accurately dynamically scale to the demands of spinning up sandboxes, especially the db.</p>

<h2 id="about-the-localstack-shaped-elephant-in-the-room">About the LocalStack-shaped elephant in the room</h2>
<p>Why build all this when LocalStack exists? I frankly didn’t know about LocalStack’s sandbox support and only learned about it when Bill Easton was lauding them on LinkedIn. I certainly learned a lot about the wiring and internals of our AWS setup and the limitations of per-account AWS resources in the process and would definitely consider a solution like LocalStack if I was to do this again. That being said, the crunchiest parts of the project, e.g. generating, updating and maintaining the template DB, would have still been required.</p>

<h2 id="why-not-build-this-in-kubernetes">Why not build this in Kubernetes</h2>
<p>The sandboxing use case does sound like a perfect fit for kubernetes - spinning up and down sandboxes.
Our main deployment does however not run on k8s, so if we wanted the sandboxes to model our production stack, we would have to move all of that over to k8s.
Most of the difficulty in this process also did not come from starting/shutting down the AWS resources. The most difficult part was getting the database seeding right, and k8s doesn’t help with that. As a result the move to k8s did not seem worth it for our use case. When the time is right, we will revisit a port to k8s.
Currently, I am considering moving most of our deployment to a parametrized CloudFormation template so we have an even easier time spinning up/down instances.</p>

<p><img src="/assets/blog/2026-08-10/sandbox2_1920px.png" alt="Lego Figure in Sandbox" title="Lego figure standing inside a lego sandbox" /></p>

<h2 id="whats-next">What’s next</h2>

<p>It’s a running joke at work that my three values are observability, observability, observability. Since the logs from these sandboxes are tagged with the sandbox ID, it should be easy for us to make a nice dashboard with a switcher so we can observe any individual sandbox from the same dashboard instead of creating a new dashboard for each and flooding our dashboard section.
Being able to see the backend activity visualized like that is really handy when testing new backend features and will be the next thing I build when I get the time.</p>

<p>This has been my favorite infra project so far because it really had me dig through all aspects of our infra, from the networking intricacies and zero-downtime deployment to db setup strategies. The best part has been the positive response and regular usage from the team, which is what makes me consider this a success.</p>

<p>Other than adding observability and fixing a few issues with the implementation, much like for the developers at shopify, user feedback and user data will tell me what direction I get to push this project next.
There is also potential in using these sandboxes for letting agents experiment, but that and all the associated engineering changes might be the subject of a future writeup.</p>]]></content><author><name>Tobias Schraink</name></author><summary type="html"><![CDATA[Every tech company faces this problem at some point: features are tested locally but shipped in the cloud, and the discrepancies are often difficult to account for. Short-lived cloud-native sandboxes are one way to address this and come with a few additional benefits. These ephemeral sandboxes allow us developers to share a working live version of our app with other members of the company, have them interact with it and allow us to afterwards query the logs to see if everything worked as intended. This async cloud-native nature makes ephemeral sandboxes an attractive solution, even for tech stacks that can comfortably stay performant on the local dev stack.]]></summary><media:thumbnail xmlns:media="http://search.yahoo.com/mrss/" url="https://tobsecret.github.io/assets/default-social-image.png" /><media:content medium="image" url="https://tobsecret.github.io/assets/default-social-image.png" xmlns:media="http://search.yahoo.com/mrss/" /></entry><entry><title type="html">How to set up this blog with Jekyll and GitHub pages</title><link href="https://tobsecret.github.io/2026/02/15/Setting-up-a-blog-with-Jekyll-and-GitHubPages/" rel="alternate" type="text/html" title="How to set up this blog with Jekyll and GitHub pages" /><published>2026-02-15T07:00:00-05:00</published><updated>2026-02-15T07:00:00-05:00</updated><id>https://tobsecret.github.io/2026/02/15/Setting-up-a-blog-with-Jekyll-and-GitHubPages</id><content type="html" xml:base="https://tobsecret.github.io/2026/02/15/Setting-up-a-blog-with-Jekyll-and-GitHubPages/"><![CDATA[<h2 id="outline">Outline</h2>
<ul>
  <li>Installation and setup</li>
  <li>Quick setup</li>
  <li>Minimal viable website
    <ul>
      <li>Starting jekyll server</li>
      <li>Adding first content</li>
    </ul>
  </li>
  <li>Updating preferences
    <ul>
      <li>Updating (S)CSS</li>
      <li>Adding socials to the footer</li>
      <li>Adding a feature image</li>
    </ul>
  </li>
</ul>

<p>On <a href="https://docs.github.com/en/pages">GitHub Pages</a> you can host websites like this one for free. There are tons of tutorials out there, here I’m just sharing how I set up this very blog you’re reading.</p>

<p>By default GitHub Pages uses Jekyll for building your website but they will <a href="https://docs.github.com/en/pages/getting-started-with-github-pages/creating-a-github-pages-site#static-site-generators">also accept</a> already built static files or your own workflow for building your website.</p>

<p>In this post I am using <code class="language-plaintext highlighter-rouge">Jekyll</code> and the template <a href="https://github.com/daviddarnes/alembic"><code class="language-plaintext highlighter-rouge">alembic</code></a>. I will show how and what I modified to make my site.</p>

<h2 id="installation-and-setup">Installation and setup</h2>

<p>We will be using <code class="language-plaintext highlighter-rouge">Jekyll</code> and <code class="language-plaintext highlighter-rouge">bundler</code> so we can locally preview the website while working on it.</p>

<p>To install Jekyll we’ll first install ruby.
On <em>Linux</em> or <em>Windows Subsystem for Linux</em> (WSL) we install like this:</p>
<div class="language-bash highlighter-rouge"><div class="highlight"><pre class="highlight"><code><span class="nb">sudo </span>apt <span class="nb">install </span>ruby-full build-essential zlib1g-dev
</code></pre></div></div>
<p>On a mac we do:</p>
<div class="language-bash highlighter-rouge"><div class="highlight"><pre class="highlight"><code>brew <span class="nb">install </span>ruby
</code></pre></div></div>

<p>Next we install <code class="language-plaintext highlighter-rouge">bundler</code> which we will use to manage the ruby plugins.</p>
<div class="language-bash highlighter-rouge"><div class="highlight"><pre class="highlight"><code>gem <span class="nb">install </span>bundler
</code></pre></div></div>
<p>We’ll make our project directory and call it <code class="language-plaintext highlighter-rouge">my_jekyll_website</code></p>
<div class="language-bash highlighter-rouge"><div class="highlight"><pre class="highlight"><code><span class="nb">mkdir </span>my_jekyll_website
<span class="nb">cd </span>my_jekyll_website
</code></pre></div></div>
<p>To setup our project we record our dependencies in the <code class="language-plaintext highlighter-rouge">Gemfile</code>.</p>

<p><code class="language-plaintext highlighter-rouge">Gemfile</code></p>
<div class="language-ruby highlighter-rouge"><div class="highlight"><pre class="highlight"><code><span class="n">source</span> <span class="s1">'https://rubygems.org'</span>
<span class="n">gem</span> <span class="s2">"github-pages"</span><span class="p">,</span> <span class="ss">group: :jekyll_plugins</span>
<span class="n">gem</span> <span class="s2">"jekyll-remote-theme"</span>
</code></pre></div></div>
<p>We are using the <code class="language-plaintext highlighter-rouge">github-pages</code> plugin so we can test locally.
The <code class="language-plaintext highlighter-rouge">jekyll-remote-theme</code> plugin lets us use themes other than those <a href="https://github.com/pages-themes">preconfigured</a> for GitHub Pages. We will show in the  section <a href="#adding-first-content">adding first content</a> how to use a <code class="language-plaintext highlighter-rouge">remote theme</code>.</p>

<p>Next we’ll add jekyll to the <code class="language-plaintext highlighter-rouge">Gemfile</code> like so:</p>
<div class="language-bash highlighter-rouge"><div class="highlight"><pre class="highlight"><code>bundle add jekyll
</code></pre></div></div>
<p>This will pin a specific version of jekyll, in my case <code class="language-plaintext highlighter-rouge">3.10</code>.</p>

<p>Now we install all the dependencies</p>
<div class="language-bash highlighter-rouge"><div class="highlight"><pre class="highlight"><code>bundle <span class="nb">install</span>
</code></pre></div></div>

<h2 id="quick-setup">Quick Setup</h2>

<p>The remainder of this post is about setting up elements piece by piece, explaining what they do and how to modify them. If you want to just get started right now and change things later, you can download the <a href="https://github.com/daviddarnes/alembic-kit/archive/remote-theme.zip">GitHub Pages with remote theme kit</a> linked to on the theme’s <a href="https://github.com/daviddarnes/alembic">GitHub</a>. This kit uses reasonable defaults and enables most features from the get-go. You can still always come back to my post and read about how to further modify the theme for your needs.</p>

<h2 id="minimal-viable-website">Minimal viable website</h2>

<h3 id="starting-jekyll-server">Starting jekyll server</h3>
<p>If we want jekyll to start serving a webpage from our directory, we run the following command.</p>
<div class="language-bash highlighter-rouge"><div class="highlight"><pre class="highlight"><code>bundle <span class="nb">exec </span>jekyll serve <span class="nt">--watch</span>
</code></pre></div></div>
<p>This will keep jekyll running and refreshing as we make changes. 
The initial output should show us something like this:</p>
<pre><code class="language-log">To use retry middleware with Faraday v2.0+, install `faraday-retry` gem
            Source: /home/myuser/my_jekyll_website
       Destination: /home/myuser/my_jekyll_website/_site
 Incremental build: disabled. Enable with --incremental
      Generating... 
                    done in 1.573 seconds.
 Auto-regeneration: enabled for '/home/myuser/my_jekyll_website'
    Server address: http://127.0.0.1:4000
  Server running... press ctrl-c to stop.
</code></pre>
<p>This also creates a directory called <code class="language-plaintext highlighter-rouge">_site</code> which jekyll has populated with an assets folder:</p>
<div class="language-bash highlighter-rouge"><div class="highlight"><pre class="highlight"><code><span class="nb">ls</span> <span class="nt">-la</span> _site
</code></pre></div></div>
<pre><code class="language-log">total 12
drwxrwxr-x 3 tobsecret tobsecret 4096 Feb  5 22:33 .
drwxrwxr-x 3 tobsecret tobsecret 4096 Feb  5 22:33 ..
drwxrwxr-x 3 tobsecret tobsecret 4096 Feb  5 22:33 assets
</code></pre>

<p>If we now go to <a href="http://127.0.0.1:4000">http://127.0.0.1:4000</a> we see jekyll is serving up the file structure of our <code class="language-plaintext highlighter-rouge">_site</code> directory:
<img src="/assets/blog/2026-02-15/minimal_jekyll_screenshot.png" alt="Minimal Jekyll Website Screenshot" title="What Jekyll serves you in a directory empty besides the Gemfile" /></p>

<p>This <code class="language-plaintext highlighter-rouge">_site</code> directory can have a lot of files in it, so we’d like to not have those show up when we use <code class="language-plaintext highlighter-rouge">git</code> for version control, so we’ll make a <code class="language-plaintext highlighter-rouge">.gitignore</code> file to ignore this and a few other artefacts that Jekyll can create:</p>

<p><code class="language-plaintext highlighter-rouge">.gitignore</code></p>
<div class="language-plaintext highlighter-rouge"><div class="highlight"><pre class="highlight"><code>_site
.jekyll-cache
.sass-cache
</code></pre></div></div>
<h3 id="adding-first-content">Adding first content</h3>

<p>I am using a Jekyll template called <a href="https://github.com/daviddarnes/alembic">Alembic</a> for my blog which comes with a nice default setup. 
In our <code class="language-plaintext highlighter-rouge">_config.yml</code> we’ll tell Jekyll to use the <code class="language-plaintext highlighter-rouge">jekyll-remote-theme</code> plugin and specify the <code class="language-plaintext highlighter-rouge">remote_theme: daviddarnes/alembic@main</code>. In the <code class="language-plaintext highlighter-rouge">navigation_header</code> section we’ll specify two sections: <code class="language-plaintext highlighter-rouge">Home</code> and <code class="language-plaintext highlighter-rouge">Blog</code>. For our webpage this will generate a Home and a Blog link at the top of every page in the navigation header.</p>

<p><code class="language-plaintext highlighter-rouge">_config.yml</code></p>
<div class="language-yml highlighter-rouge"><div class="highlight"><pre class="highlight"><code><span class="na">title</span><span class="pi">:</span> <span class="s">Tobsecret's homepage</span>
<span class="na">description</span><span class="pi">:</span> <span class="s">Programming Blog &amp; Dominion sets</span>
<span class="na">plugins</span><span class="pi">:</span>
  <span class="pi">-</span> <span class="s">jekyll-remote-theme</span>
<span class="na">remote_theme</span><span class="pi">:</span> <span class="s">daviddarnes/alembic@main</span>

<span class="c1"># 9. Site navigation</span>
<span class="na">navigation_header</span><span class="pi">:</span>
<span class="pi">-</span> <span class="na">title</span><span class="pi">:</span> <span class="s">Home</span>
  <span class="na">url</span><span class="pi">:</span> <span class="s">/</span>
<span class="pi">-</span> <span class="na">title</span><span class="pi">:</span> <span class="s">Blog</span>
  <span class="na">url</span><span class="pi">:</span> <span class="s">/blog/</span>

</code></pre></div></div>
<p>The paths in the <code class="language-plaintext highlighter-rouge">navigation_header</code> section specify the path in our directory where jekyll should be looking for a file called <code class="language-plaintext highlighter-rouge">index.md</code> that has the content for the page.</p>

<p>So for our <code class="language-plaintext highlighter-rouge">Home</code> page it will look in <code class="language-plaintext highlighter-rouge">/</code>, so directly in our project directory.</p>

<p><code class="language-plaintext highlighter-rouge">index.md</code></p>

<div class="language-markdown highlighter-rouge"><div class="highlight"><pre class="highlight"><code><span class="nn">---</span>
<span class="na">layout</span><span class="pi">:</span> <span class="s">page</span>
<span class="na">title</span><span class="pi">:</span> <span class="s">Home</span>
<span class="nn">---</span>


<span class="p">---
</span>
Latest blog posts:
{% for post in site.posts limit:5 %}
<span class="p">-</span> <span class="p">[</span><span class="nv">{{ post.title }}</span><span class="p">](</span><span class="sx">{{</span> post.url }}) — {{ post.date | date: "%Y-%m-%d" }}
{% endfor %}
</code></pre></div></div>

<p><code class="language-plaintext highlighter-rouge">layout: page</code> is important since <code class="language-plaintext highlighter-rouge">Alembic</code> predefines the layouts for <code class="language-plaintext highlighter-rouge">page</code> and <code class="language-plaintext highlighter-rouge">post</code>, i.e. those pages will get the navigation header and other features of <code class="language-plaintext highlighter-rouge">Alembic</code>.</p>

<p>The little loop in the <code class="language-plaintext highlighter-rouge">index.md</code> grabs the latest 5 posts from the <code class="language-plaintext highlighter-rouge">_posts</code> folder by their <code class="language-plaintext highlighter-rouge">date</code> field.</p>

<p>If we refresh our page, it should now look like this:
<img src="/assets/blog/2026-02-15/minimal_config_alembic_screenshot.png" alt="minimal_config_alembic_screenshot.png" title="Notice the header now has two links" />
Notice the header now has two links, one to <code class="language-plaintext highlighter-rouge">Home</code> and one to <code class="language-plaintext highlighter-rouge">Blog</code>.</p>
<p>If we clicked on <code class="language-plaintext highlighter-rouge">Blog</code> we would get a <code class="language-plaintext highlighter-rouge">404: File Not Found</code>.</p>

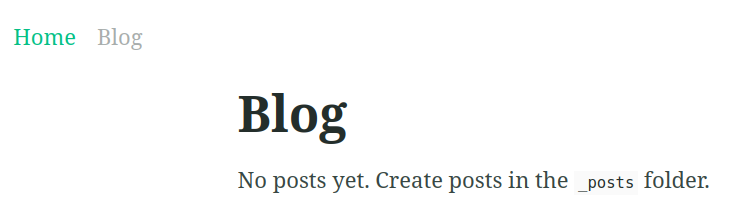
<p>To populate that page we’d have to make another page <code class="language-plaintext highlighter-rouge">blog/index.md</code> which I’d just copy what the template uses:</p>

<div class="language-markdown highlighter-rouge"><div class="highlight"><pre class="highlight"><code><span class="nn">---</span>
<span class="na">layout</span><span class="pi">:</span> <span class="s">page</span>
<span class="na">title</span><span class="pi">:</span> <span class="s">Blog</span>
<span class="na">permalink</span><span class="pi">:</span> <span class="s">/blog/</span>
<span class="nn">---</span>


{% if site.posts.size == 0 %}
No posts yet. Create posts in the <span class="sb">`_posts`</span> folder.
{% else %}
<span class="nt">&lt;ul&gt;</span>
{% for post in site.posts %}
  <span class="nt">&lt;li&gt;&lt;a</span> <span class="na">href=</span><span class="s">"{{ post.url }}"</span><span class="nt">&gt;</span>{{ post.title }}<span class="nt">&lt;/a&gt;</span> — {{ post.date | date: "%Y-%m-%d" }}<span class="nt">&lt;/li&gt;</span>
{% endfor %}
<span class="nt">&lt;/ul&gt;</span>
{% endif %}
</code></pre></div></div>

<p><img src="/assets/blog/2026-02-15/empty_blog_screenshot.png" alt="empty_blog_screenshot.png" /></p>

<p>Now if we wanted to add our first post, so something actually shows up in the blog, we want to create a file <code class="language-plaintext highlighter-rouge">_posts/2026-02-15-first-post.md</code>:</p>

<div class="language-markdown highlighter-rouge"><div class="highlight"><pre class="highlight"><code><span class="nn">---</span>
<span class="na">layout</span><span class="pi">:</span> <span class="s">post</span>
<span class="na">title</span><span class="pi">:</span> <span class="s2">"</span><span class="s">Writing</span><span class="nv"> </span><span class="s">helps</span><span class="nv"> </span><span class="s">me</span><span class="nv"> </span><span class="s">think"</span>
<span class="na">date</span><span class="pi">:</span> <span class="s">2026-02-15 12:00:00 +0000</span>
<span class="nn">---</span>
When I write about the software I write, I find myself looking up 
a lot more questions than when I am just getting things done.
</code></pre></div></div>
<p>And now our blog page is updated:
<img src="/assets/blog/2026-02-15/updated_blog_post_view.png" alt="updated_blog_post_view" /></p>

<p>You can similarly also copy the <code class="language-plaintext highlighter-rouge">Search</code> section by adding a section in the <code class="language-plaintext highlighter-rouge">navigation_header</code> section of your <code class="language-plaintext highlighter-rouge">_config.yml</code>:</p>

<div class="language-yaml highlighter-rouge"><div class="highlight"><pre class="highlight"><code><span class="na">navigation_header</span><span class="pi">:</span>
<span class="pi">-</span> <span class="na">title</span><span class="pi">:</span> <span class="s">Home</span>
  <span class="na">url</span><span class="pi">:</span> <span class="s">/</span>
<span class="nn">...</span>
<span class="pi">-</span> <span class="na">title</span><span class="pi">:</span> <span class="s">Search</span>
  <span class="na">url</span><span class="pi">:</span> <span class="s">/search/</span>
</code></pre></div></div>

<p>and copying over the <code class="language-plaintext highlighter-rouge">search/index.md</code>:</p>

<div class="language-markdown highlighter-rouge"><div class="highlight"><pre class="highlight"><code><span class="nn">---</span>
<span class="na">title</span><span class="pi">:</span> <span class="s">Search</span>
<span class="na">excerpt</span><span class="pi">:</span> <span class="s2">"</span><span class="s">Search</span><span class="nv"> </span><span class="s">for</span><span class="nv"> </span><span class="s">a</span><span class="nv"> </span><span class="s">page</span><span class="nv"> </span><span class="s">or</span><span class="nv"> </span><span class="s">post</span><span class="nv"> </span><span class="s">you're</span><span class="nv"> </span><span class="s">looking</span><span class="nv"> </span><span class="s">for"</span>
<span class="nn">---</span>

{% include site-search.html %}
</code></pre></div></div>

<h3 id="updating-preferences">Updating preferences</h3>

<h3 id="updating-scss">Updating (S)CSS</h3>

<p>Usually to update files that the template has pre-defined, we have to provide an alternative copy of that file.</p>

<p>To update the site’s styling via SCSS everything goes through <code class="language-plaintext highlighter-rouge">assets/styles.scss</code> which looks like this in the template default:</p>

<div class="language-css highlighter-rouge"><div class="highlight"><pre class="highlight"><code><span class="nt">---</span>
<span class="nt">title</span><span class="o">:</span> <span class="nt">false</span>
<span class="nt">styles</span><span class="o">:</span> <span class="nt">true</span>
<span class="nt">---</span>
<span class="k">@import</span> <span class="s1">"alembic"</span><span class="p">;</span>
</code></pre></div></div>
<p>When Jekyll processes this Sass (.scss), <code class="language-plaintext highlighter-rouge">@import "alembic"</code> generates all of the style elements included with the template. This means if we want to change any of those, we have to import or explicitly call them before <code class="language-plaintext highlighter-rouge">alembic</code> is imported.</p>

<p>Let’s change the colors via a file <code class="language-plaintext highlighter-rouge">_sass/modified_colors.scss</code>. Putting it in the <code class="language-plaintext highlighter-rouge">_sass</code> folder means Jekyll will find it when we try to import it.</p>

<p><code class="language-plaintext highlighter-rouge">_sass/modified_colors.scss</code>.</p>
<div class="language-css highlighter-rouge"><div class="highlight"><pre class="highlight"><code><span class="err">$</span><span class="nt">linkColour</span><span class="o">:</span> <span class="err">#61</span><span class="nt">AFFF</span><span class="o">;</span> <span class="o">//</span> <span class="nt">Modulex</span> <span class="nt">Medium</span> <span class="nt">Blue</span>
<span class="err">$</span><span class="nt">hoverColour</span><span class="o">:</span> <span class="err">#0055</span><span class="nt">BF</span><span class="o">;</span> <span class="o">//</span> <span class="nt">Blue</span> 
<span class="err">$</span><span class="nt">accentColour</span><span class="o">:</span> <span class="err">#61</span><span class="nt">AFFF</span><span class="o">;</span> <span class="o">//</span> <span class="nt">Modulex</span> <span class="nt">Medium</span> <span class="nt">Blue</span>
</code></pre></div></div>

<p>We also have to modify <code class="language-plaintext highlighter-rouge">assets/styles.scss</code> to import the colors before <code class="language-plaintext highlighter-rouge">alembic</code> gets imported:</p>

<p><code class="language-plaintext highlighter-rouge">assets/styles.scss</code></p>
<div class="language-css highlighter-rouge"><div class="highlight"><pre class="highlight"><code><span class="nt">---</span>
<span class="nt">title</span><span class="o">:</span> <span class="nt">false</span>
<span class="nt">styles</span><span class="o">:</span> <span class="nt">true</span>
<span class="nt">---</span>
<span class="k">@import</span> <span class="s1">"modified_colors"</span><span class="p">;</span>
<span class="k">@import</span> <span class="s1">"alembic"</span><span class="p">;</span>
</code></pre></div></div>

<p>Any additional SCSS can be imported below alembic, e.g. for my dominion section I wrote <a href="/_sass/_dominion.scss"><code class="language-plaintext highlighter-rouge">_dominion.scss</code></a> to standardize the formatting of the dominion cards and the containers for the expansions.</p>
<h3 id="adding-an-rss-feed">Adding an RSS feed</h3>
<p>RSS feeds can be used to automatically get updated when a new post is published via an RSS reader like <a href="https://feedly.com/">Feedly</a>. 
In <code class="language-plaintext highlighter-rouge">Jekyll</code> we only have to add this little line to our <code class="language-plaintext highlighter-rouge">_config.yml</code></p>
<div class="language-yaml highlighter-rouge"><div class="highlight"><pre class="highlight"><code><span class="na">plugins</span><span class="pi">:</span>
  <span class="s">...</span>
  <span class="s">- jekyll-feed</span>
</code></pre></div></div>
<p>Now our RSS feed is automatically generated and available at <code class="language-plaintext highlighter-rouge">&lt;domain&gt;/feed.xml</code> (i.e. <code class="language-plaintext highlighter-rouge">tobsecret.github.io/feed.xml</code>).</p>

<h3 id="adding-socials-to-the-footer">Adding socials to the footer</h3>

<p>By default the template sets up the footer to contain the same navigation as the header, or optionally a clickable link with some text. The template also features a way to include social links and having them displayed in an aside.
For my blog I wanted these socials to instead show in the footer.</p>

<p>First let’s set up our socials in <code class="language-plaintext highlighter-rouge">_config.yml</code> as defined by the template:</p>
<div class="language-yml highlighter-rouge"><div class="highlight"><pre class="highlight"><code><span class="na">social_links</span><span class="pi">:</span>
  <span class="na">LinkedIn</span><span class="pi">:</span> <span class="s">https://www.linkedin.com/in/tschraink</span>
  <span class="na">GitHub</span><span class="pi">:</span> <span class="s">https://github.com/tobsecret</span>
  <span class="na">RSS</span><span class="pi">:</span> <span class="s">/feed.xml</span>
</code></pre></div></div>

<p>All we need to do is to create <code class="language-plaintext highlighter-rouge">_includes/nav-footer.html</code> with this content:</p>

<div class="language-html highlighter-rouge"><div class="highlight"><pre class="highlight"><code>{% if site.navigation_footer %}
<span class="nt">&lt;nav</span> <span class="na">class=</span><span class="s">"nav  nav--footer"</span><span class="nt">&gt;</span>
  <span class="nt">&lt;ul</span> <span class="na">class=</span><span class="s">"list list--nav"</span><span class="nt">&gt;</span>
{% include nav-social.html %}
  <span class="nt">&lt;/ul&gt;</span>
<span class="nt">&lt;/nav&gt;</span>
{% else %}
  {% include nav-default.html %}
{% endif %}
</code></pre></div></div>

<p>The template provides its own <code class="language-plaintext highlighter-rouge">_includes/nav-footer.html</code> which instead of just  <code class="language-plaintext highlighter-rouge">{% include nav-social.html %}</code>  includes some logic for handling the text + external link the template would use.</p>

<p>We also have to enable this footer in the <code class="language-plaintext highlighter-rouge">_config.yml</code> like so:</p>
<div class="language-yaml highlighter-rouge"><div class="highlight"><pre class="highlight"><code><span class="na">navigation_footer</span><span class="pi">:</span> <span class="no">true</span>
</code></pre></div></div>
<p>And we can now see the socials in our footer:
<img src="/assets/blog/2026-02-15/footer_with_socials.png" alt="footer_with_socials.png" /></p>

<h3 id="adding-a-feature-image">Adding a feature image</h3>

<p>I spent some time to model and render my banner image in Blender and wanted to add it to each post. My banner is <code class="language-plaintext highlighter-rouge">assets/banner.webp</code>. 
We can add this for all posts by adding the following to our <code class="language-plaintext highlighter-rouge">_config.yml</code>:</p>
<div class="language-yaml highlighter-rouge"><div class="highlight"><pre class="highlight"><code><span class="c1"># 5. Collections</span>
<span class="na">defaults</span><span class="pi">:</span>
  <span class="pi">-</span>
    <span class="na">scope</span><span class="pi">:</span>
      <span class="na">path</span><span class="pi">:</span> <span class="s2">"</span><span class="s">"</span>
      <span class="na">type</span><span class="pi">:</span> <span class="s2">"</span><span class="s">posts"</span>
    <span class="na">values</span><span class="pi">:</span>
      <span class="na">layout</span><span class="pi">:</span> <span class="s">post</span> <span class="c1"># Set the default layout for posts</span>
      <span class="na">feature_image</span><span class="pi">:</span> <span class="s2">"</span><span class="s">/assets/banner.webp"</span>
  <span class="pi">-</span>
    <span class="na">scope</span><span class="pi">:</span>
      <span class="na">path</span><span class="pi">:</span> <span class="s2">"</span><span class="s">"</span>
      <span class="na">type</span><span class="pi">:</span> <span class="s2">"</span><span class="s">pages"</span>
    <span class="na">values</span><span class="pi">:</span>
      <span class="na">layout</span><span class="pi">:</span> <span class="s">page</span> <span class="c1"># Set the default layout for pages</span>
      <span class="na">feature_image</span><span class="pi">:</span> <span class="s2">"</span><span class="s">/assets/banner.webp"</span>
</code></pre></div></div>
<p>This won’t update immediately in your browser so you’ll have to interrupt your <code class="language-plaintext highlighter-rouge">bundle exec jekyll serve --watch</code> call with <code class="language-plaintext highlighter-rouge">CTRL+C</code> and then restart it. Refresh the page and you should see the banner at the top.</p>

<p>You can still manually override it in any particular <code class="language-plaintext highlighter-rouge">page</code> or <code class="language-plaintext highlighter-rouge">post</code> by specifying a <code class="language-plaintext highlighter-rouge">feature_image</code> in the markdown:</p>
<div class="language-markdown highlighter-rouge"><div class="highlight"><pre class="highlight"><code><span class="nn">---</span>
<span class="na">layout</span><span class="pi">:</span> <span class="s">page</span>
<span class="na">title</span><span class="pi">:</span> <span class="s">Blog</span>
<span class="na">permalink</span><span class="pi">:</span> <span class="s">/blog/</span>
<span class="na">feature_image</span><span class="pi">:</span> <span class="s">/assets/some_other_banner.png</span>
<span class="nn">---</span>
</code></pre></div></div>]]></content><author><name>Tobias Schraink</name></author><summary type="html"><![CDATA[Outline Installation and setup Quick setup Minimal viable website Starting jekyll server Adding first content Updating preferences Updating (S)CSS Adding socials to the footer Adding a feature image]]></summary><media:thumbnail xmlns:media="http://search.yahoo.com/mrss/" url="https://tobsecret.github.io/assets/default-social-image.png" /><media:content medium="image" url="https://tobsecret.github.io/assets/default-social-image.png" xmlns:media="http://search.yahoo.com/mrss/" /></entry></feed>